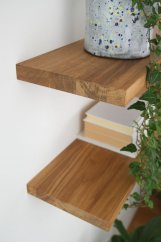
Assembly instructions - Shelve Odhal.

Assembly instructions for the Odhal shelf with hidden attachment

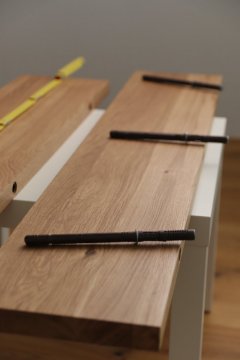
For every size ouk shelf Odhal the appropriate number of mounting pins (hereinafter referred to as “pins”) is included.
The shorter part of the pin belongs to the wall - it opens (similar to a dowel) and is secured in the wall in this way.
The longer part of the pin then sticks out from the wall, and the Odhal shelf itself is pushed into the prepared holes on it.

Complete procedure:

  1. Using a spirit level, draw a horizontal line corresponding to the width of your Odhal shelf on the wall at the intended place for the shelf. This line will help you accurately drill the holes into the wall, but you don't have to worry - the line will then be covered by the Odhal shelf itself.
  2. From your Odhal shelf, measure exactly the pitches (axis) of the holes for the pins and draw these pitches on the wall as a guide line.
  3. Let's check that the drawn axes of the pins on the wall exactly correspond to the axes of the holes in the Odhal shelf to the nearest millimeter. Prepare a drill with drill bits for drilling into your type of masonry.
  4. Drill as precisely as possible in the drawn axes of the pins and also as perpendicular to the wall as possible. Start with a drill dia. 6 mm, then enlarge the hole by using a larger drill, e.g. dia. 8 mm, 10, 12 and we finish with a drill dia. 14 mm.
  5. Insert or lightly press the pins into the drilled holes - with the shorter part into the wall.
  6. The pins must be inserted up to the metal edge in the wall - if this is not possible, pull out the stud and deepen the hole.
  7. We secure the pins in the wall by placing a 12mm wrench on the stud and tightening it with sensitivity (clockwise) until the stud is firmly in place, i.e. the stud cannot be moved or pulled out.
  8. Slide the Odhal shelf onto the pins.

Recommended products1